

Alarm Banner
Alarm Banner component
Section titled “Alarm Banner component”
The alarm banner is a strip across the page that shows one active alarm at a time and rotates through them. It is meant to stay visible while the operator works on another part of the screen.
Each entry shows the time the alarm was raised, its name and its message, coloured by priority.
Features
Section titled “Features”Configuration
Section titled “Configuration”Rotate interval - how long each alarm is shown before the next one, in milliseconds. The default is 5000.
Show acknowledge - shows an ACK control on the banner, so the alarm can be acknowledged without leaving the page.
Show dismiss - shows a dismiss control, which removes the alarm from the banner without acknowledging it.
Alarm filter
Section titled “Alarm filter”Every alarm component shares these three properties. They decide which alarms this component shows; they never change the alarms themselves. An empty value means “show all”.
Areas - show only alarms from these areas. Add one entry per area.
Category - show only alarms of this category. The options come from the connector’s own category table, so they cannot drift from the values the filter compares against.
Min priority - show only alarms at or above this priority.
Alarms are raised by the runtime, not by the HMI — see Alarming.
The style properties define the look of the component.
Each priority - Critical, High, Medium and Low - has its own background and text color. A hex value can be input in one of the formats:
#RRGGBB#RRGGBBAA#RGB#RGBA
Where:
R=red color componentG=green color componentB=blue color componentA=alpha (transparency) component
Alternatively, the integrated color picker can be used to visually pick a color:
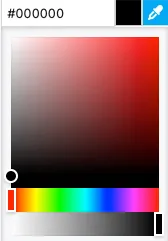
Border color - the color used for the component border.
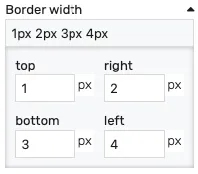
Border width - controls the width of the border on each side. Values can be manually input as:
<top>px <right>px <bottom>px <left>px<top_bottom>px <left_right>px<all>px
Alternatively, the built-in border editor can be used for a visual input:
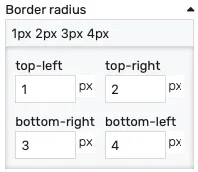
Border radius - border radius for the border corners. Values can be manually input as:
<top-left>px <top-right>px <bottom-left>px <bottom-right>px<left>px <right>px<all>px
Alternatively, the built-in border radius editor can be used for a visual input:
Opacity - controls the transparency of the component.
Position
Section titled “Position”The banner is placed like a Header, not as a free rectangle. It always spans the full width of the page, so:
LeftandWidthare not shown - the banner owns them.- It can be dragged vertically only, to sit at the top of the page or below a header.
Top - distance from the top edge in pixels
Height - component height in pixels
Typography
Section titled “Typography”Font size - the size of the text inside the component.